
Just a warning...It's a bit random!:)
*I want to Vinyl Letter and Art my whole house! :D Okay, maybe not the whole thing, but they have some cool stuff out there!
www.scribbleitonline.com
I think there's other sites out there too, but this one's way cool!
You'll just have to go check it out. The wall art is especially cool like that!
*A Pillowcase Purse. Seen HERE on Somewhatsimple.blogspot.com and on Martha Stewart.com
*Modge Podge Coasters. I saw the idea on U Create (kari-youcanmakeit.blogspot.com) Click HERE for the link to the instructions.
 jpg]" border="0">**Picture from U Create**
* I want to paint some cute onesie's for the new baby!
Click HERE for the instructions.
* I want to make alot of foods. Like this one!:
Heavenly Strawberry Cake

1 box of white cake mix
1 package of Danish Dessert, *see note below
2 8oz packages of cream cheese
3/4 cups of powdered sugar
1 tsp vanilla
fresh strawberries
"***I have only seen Danish Dessert in Utah!!! No grocery store in CA or AZ that I have been to sells it! It is basically a gelatin mix (very similar to Jell-O) found in the baking aisle. In an effort to duplicate this recipe outside Utah, I have either done without it, or I have bought canned strawberry pie filling. It is definitely not as good as the Danish Dessert, but whats a girl to do?!? If any of you have any ideas on where to find this in AZ or what to use as a substitute, I would love to hear from you!!! Here is what the box looks like:" (www.somewhatsimple.blogspot.com)

5. Spread the cream cheese mixture on top of cake, then the danish dessert, then the slices of strawberry.
(**RECIPE/POST FROM: www.somewhatsimple.blogspot.com/**)
 png]" border="0">
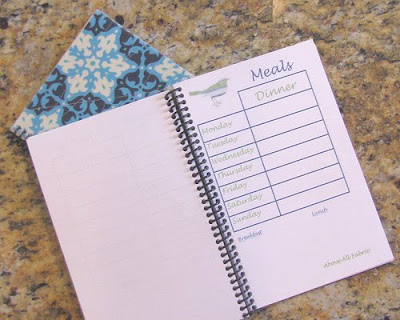
*Menu Planner. You can get them in planners and such, but it's nice to have it all seperated.
U Create Blogged it HERE. PDF File also there and I also have it.


* Sewing Machine Organizer-Linked on U CREATE To HERE
 bmp]" border="0">
* Okay, these are the coolest lists ever haha. Linked on U CREATE to HERE
Or go this way: U CREATE
Or These Ways: Freaking Never ending to do List
Blog Topics List
The Pain in the Groceries List
(See if that works...)
* This SITE has a lot of cool printable things. Like this Get Well Card.
Other Cards: Miss You Love You
Recipe Card 1
Bird Recipe Card
*Another Cool Site: Pom Pom Tutorial also seen on Leo on the Loose
*Freezer Jams. I want to make a LOT of Jam. haha
Jam Tags
Jam Recipe
This is what the labels look like. They're on the Jam Tags link to download.

* Holiday Tags-I Know, cool right!
* More Food! haha Peanut Butter Cups anyone?
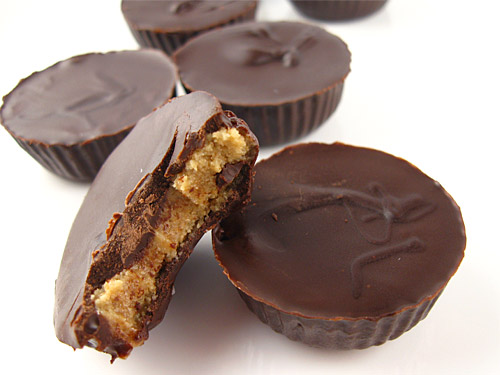 Sunbutter Cups" width="500" border="0" height="375">
*Recycled Magazine Business Card Holder

 DIY-business-card-holder.jpg]" border="0">
*Cool thing here. It's a Dropcap Letter. You'll see.
 gif]" border="0">
*I'm loving the whole Free Printable Thing! Here's a Notecard
 png]" border="0">
*I just thought this was cool: COOL PAPER
*Wood Clock: Tutorial

* Book Making HERE
* Mod Podge Ceiling Fan (Now I don't know if I'd do that here, but maybe in a future house in my teenagers bedroom or my craft room!)
 IMG_9263.JPG]" border="0">
*Textured paper??
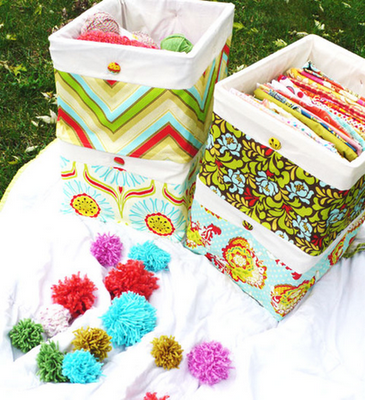
*Basket Liner: Tutorial

*Free Handwritten Fonts--I know cool right!
* Free Art Downloads--Don't you love all the cool stuff I find!:)
*Favor Boxes--way cute!

*Ipod cover and such. This is awesome, I think I found a free pattern somewhere...
*More Free Printable stuff:
The Source to all this stuff (How About Orange Site-Printables)
Invitation
Thank You Note
More fun Printables
Card 1
Card 2
Calendar
Printable Letters for Banners,etc
Calling Cards
Tiny Envelope Pattern
Mini File Folders
&Ways to Use The file folders
More Printable Gift Tag STuff
More Tags!
*Messenger Bag Pattern Not the cutest, but you could make it cool!
 jpg]" border="0">
*Kind of Cute Bookmark Pattern-Tutorial
 IMG_6459.jpg]" border="0">
*Pencil and Pad Holder
 IMG_6461.jpg]" border="0">
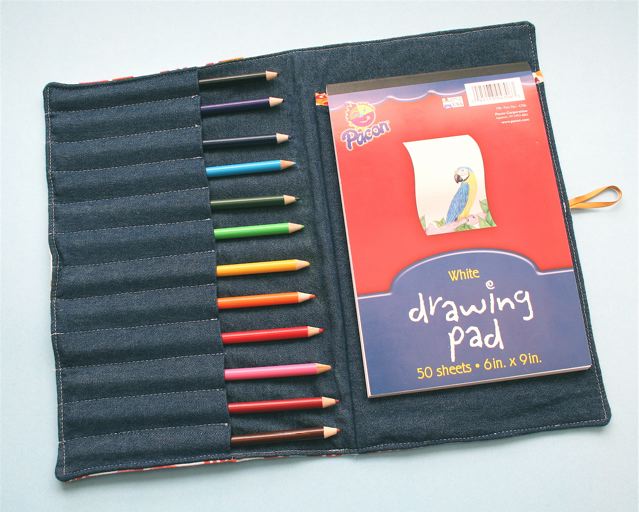 IMG_6460.jpg]" border="0">
SOURCE FOR PICTURE
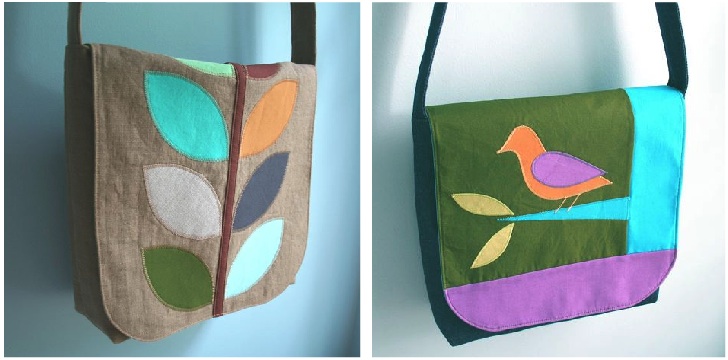
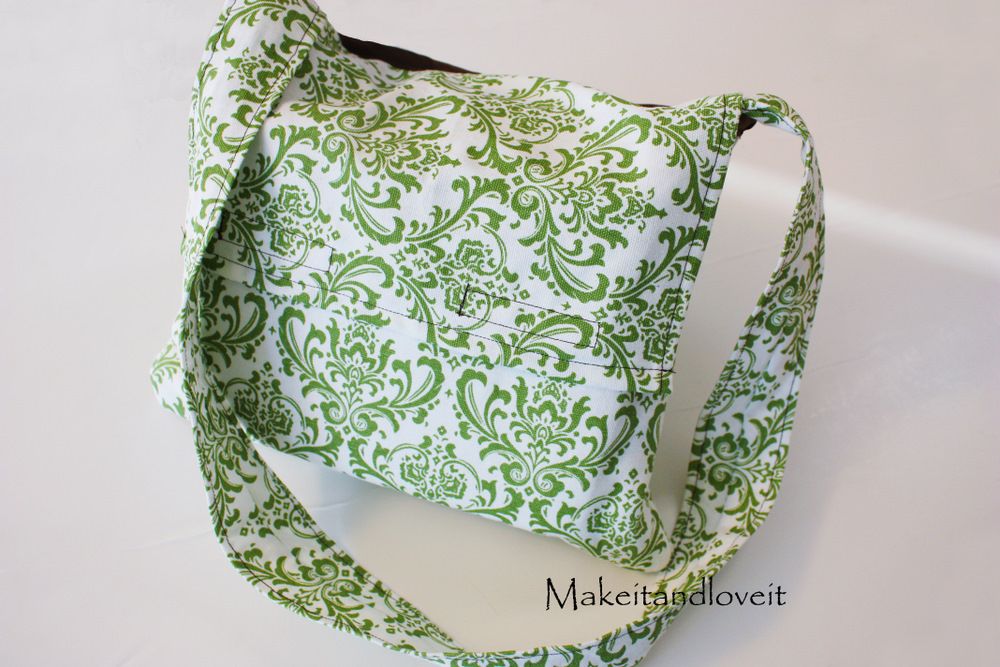
*Shoulder Bag Tutorials/Patterns--I'm totally into the bag thing right now.
Link 1
Link 2--love this one
Free Sewing Patterns-Navigate to Free Sewing Patterns, Way cool stuff!
Free Clothing Patterns--http://www.burdastyle.com/patterns A LOT OF THEM ARE FREE
*Pillow Cases!
 IMG_7435_2.jpg]" border="0">
*I just want to add that I wish there was an IKEA Here...The closest is Draper, UT...sign, oh well.
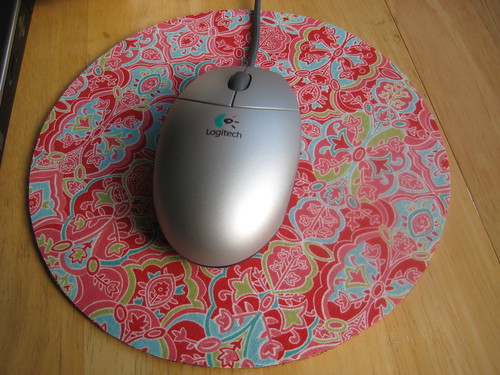
*Cork Board Mouse Pad
*Car Trash Holder

 jpg]" border="0">

*Diaper Wipes Case

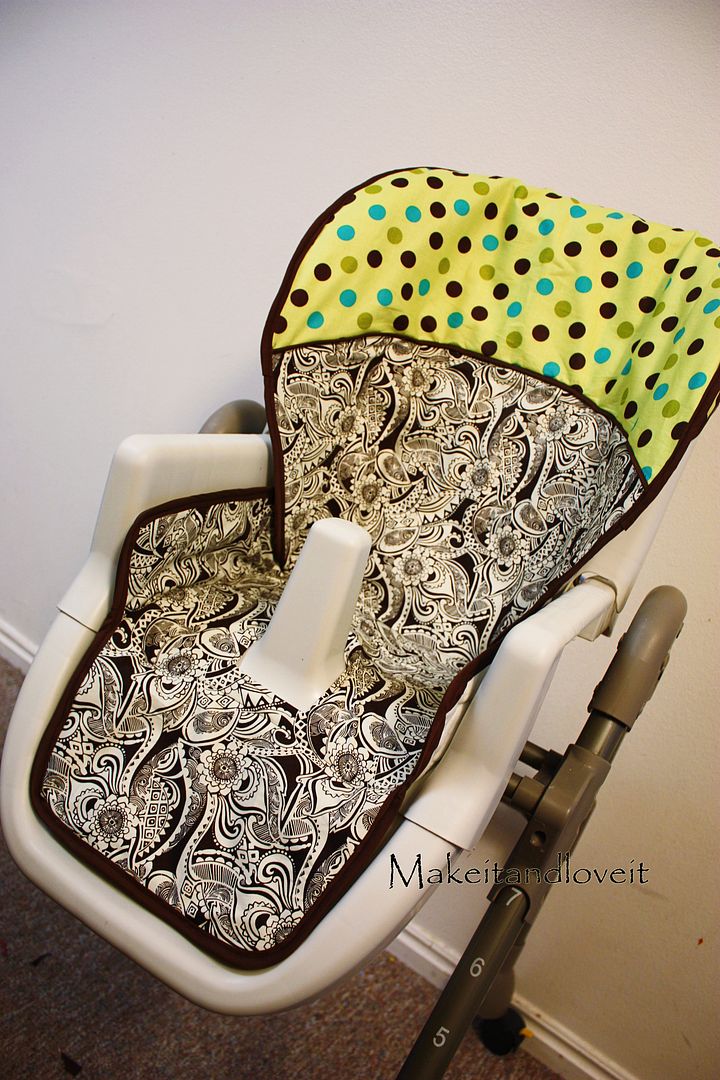
*Car Seat Cover

![[SL272325.JPG]](https://blogger.googleusercontent.com/img/b/R29vZ2xl/AVvXsEjvVzUbUcg_JYeaVJwQvpdYc2Q5GmgPzOuCbYJrpNCbV52tFwoOzkOTNbnVmbDA3oXAftRgK34h_tlZ3ynajTziu1rfPAAhQvZJr7ESUexmkIAfQFsot2DzgXwQ-OE3qS-oUDnnQBDLn7Ov/s1600/SL272325.JPG)
*Baby Blankets!!!!
![[IMG_6638.JPG]](https://blogger.googleusercontent.com/img/b/R29vZ2xl/AVvXsEgLdOucUm9aDh-q1yJAFKmRObSgb-LbcUkrhed6V55j0MKMY85CYtjF3iZUQowHHtrR63fqKb6MrMjLqxoxxgWymPCbBUZFuNzWCXpr0SymilRzKuw2vJnupYyIDxBbUsGNrc-upciMhk8e/s1600/IMG_6638.JPG)
The Whole baby set HERE
![[6a00e5538c3188883401156f567c13970b.jpg]](https://blogger.googleusercontent.com/img/b/R29vZ2xl/AVvXsEjcSW0V4nHRU7NeffpcCh3Srd6_ysv-YrC3ZjD3DPKU8ypemJ6M_u1d0xY0YXn2CY3ihSgVUCC3G-icEDHVKjjfLU4dRyk7UQegL52HpdHN22TuYcrKLRbjKy29OoCE6a3iYWoIth7vUzA/s1600/6a00e5538c3188883401156f567c13970b.jpg)
**Boppy Cover!!
![[breastfeeding-pillow-finished-a.jpg]](https://blogger.googleusercontent.com/img/b/R29vZ2xl/AVvXsEhpCvzEcxi0oDHqexakpF4r5glIx1REbT1M3bHz7YpRa7q2ZzdYDwvgd9H9BCyx6hiwwtK0sFWj2gn1yeDJb9jmISY0m6l_czHPoJmuhoyPDRGmo-kwkiw4s7lBCE1miIvFy00XNE0ML9_y/s1600/breastfeeding-pillow-finished-a.jpg)
*Bumper Pad
![[bumper+pad]](https://blogger.googleusercontent.com/img/b/R29vZ2xl/AVvXsEgMCuFtYtNR90udYPOGMnHTiMPT-mXYNvJjU8lFEni7oquUAkcs0Puj9c9kQ6wSGCtlijm-qBLctaon_gxEPUDfp8TncHix1bk86cTS_LDdT_X7jukrPrw77xyJrVQe2jI5UbG0GVinvlQ/s1600/bumper+pad)
*Ribbon Edge Blanket
![[Creative+Homemaker+and+Blog+Pics+035.jpg]](https://blogger.googleusercontent.com/img/b/R29vZ2xl/AVvXsEgFDcPkVuBiZYvA2a5DBoXRaWeLGnuFHod36FuaE6yrgbVQp6JfgLkw9Rp3ZsQi_45wzXCVxSJcTE6tZzGhtjmXPSBMrEiRokNRJi5xXOmCGAHbUSGeDUNH4f_weEFFq1PdudMl0Hf5o3w/s1600/Creative+Homemaker+and+Blog+Pics+035.jpg)
*Another Bib tutorial

*Binkie Clip Tutorial
![[binkie+clp.JPG]](https://blogger.googleusercontent.com/img/b/R29vZ2xl/AVvXsEjXQERN8Xvvk46huTmVCVvaz18R6paRUVWQ7zv5c37t0pbXaFINutSTyZhn5oo2zlwvMU-HhYxLWrRy6seAJIBXlDDwVsbWqY1VvCVZp7_8X-zsT41QrQmxJPwzFpHsvDoiKONRJJ9gb9Kl/s1600/binkie+clp.JPG)
* Nursing Cover

ALL OF THE ABOVE BABY STUFF WAS FOUND ON THE U CREATE BLOG UNDER "BABY"
CLICK HERE FOR LINK
*More Baby Stuff: Moda Bake Shop-Baby
Ribbon blanket & Block
![[RIBBON+BLANKET+copy.jpg]](https://blogger.googleusercontent.com/img/b/R29vZ2xl/AVvXsEhg0DOOx40GKYqdVQzcg3GW5wZMFAJ291p1XFJ_UpQpTRITuXGiSF7fvPkZHbhhJkV4YFMHfnzF8C_sII1pyWzAtmhQ8R8bj_15x2WnHD05qJ0XkGUcapqCeumrz3_9YuSaQtCRT0dfoIwC/s1600/RIBBON+BLANKET+copy.jpg)
MY FAVORITE Quilt and Tote! Thanks Moda!
![[Tote+Whole-1.jpg]](https://blogger.googleusercontent.com/img/b/R29vZ2xl/AVvXsEiamdeWG5DI-MgetUZkfVkSwNGmKdPi64ZZaE9815F5ZQQXbQXtuiSE7V0iV-tgr1_GCGV-WD4lZmWrcnSLKZFm7Aad3jPBSN5dyCO-l8aj7mKobguSFSs7kEzmlX7xDXprV8sH5Gbuivxr/s1600/Tote+Whole-1.jpg)
Quilt Part HERE

CUTE QUILT HERE
* Sling Bag (I know, another bag!)


Margaret Sling Bag
PDF FILE HERE
* Baskets!!
Basket 1
Basket 2
*These Sites have some cool Stuff on them:
Oh, Fransson!
Moda Bake Shop
* Grocery Bag Holder

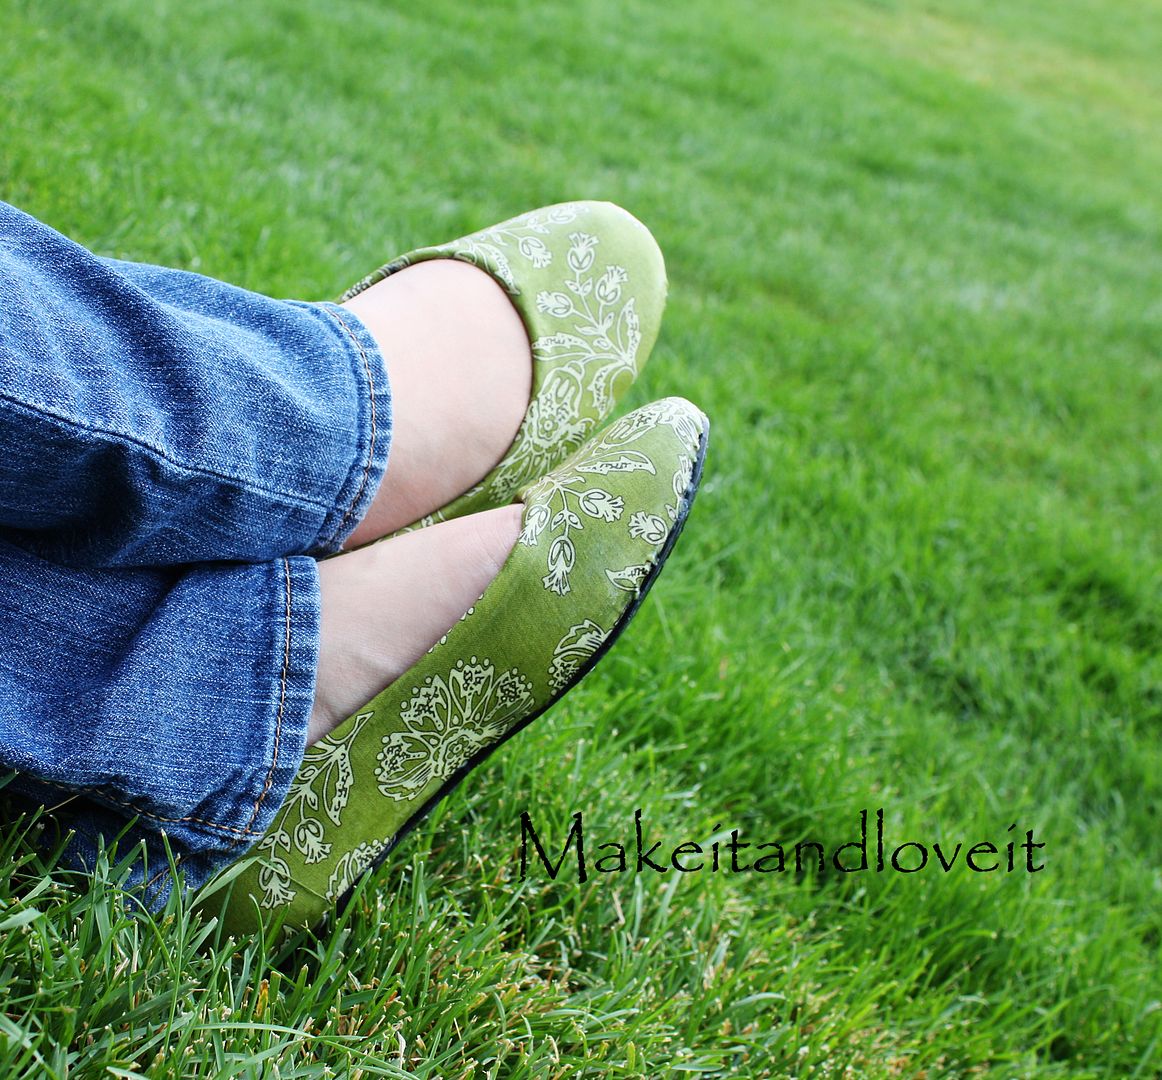
* Mod Podge Shoes!!
Link 1 -main Source
* Fabric Magnets
*Sippy Cup Leash
*Another Nursing Cover
*Apron

*Picture Frame Dry Erase Board

Items Needed: Frame &Fabric!
Just hot glue fabric onto the mat that comes with the picture frame. Put Frame back together and write on Glass! Cool right!
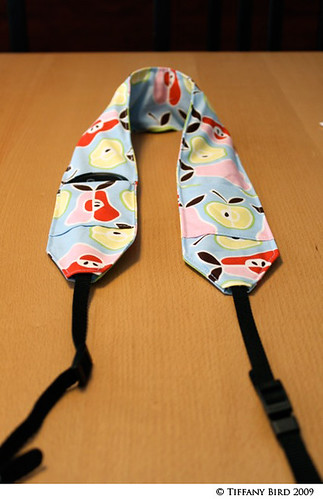
*Camera Strap

*Baby Seat Belt Covers

*Sewing Machine Cover

* Arm Band Pouch
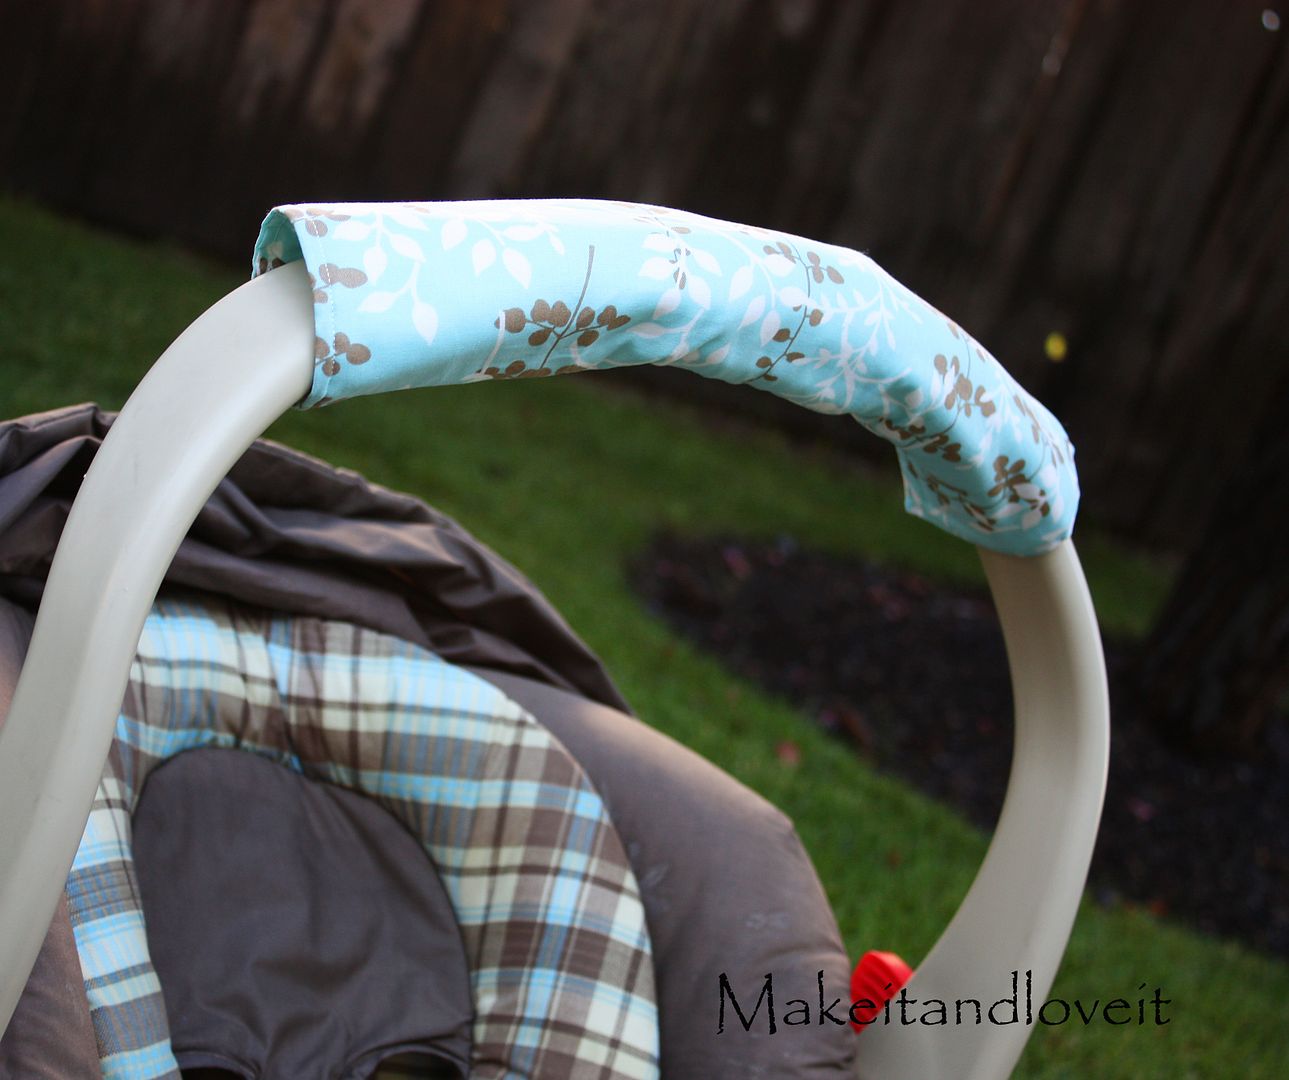
*Car Seat Handle Cover
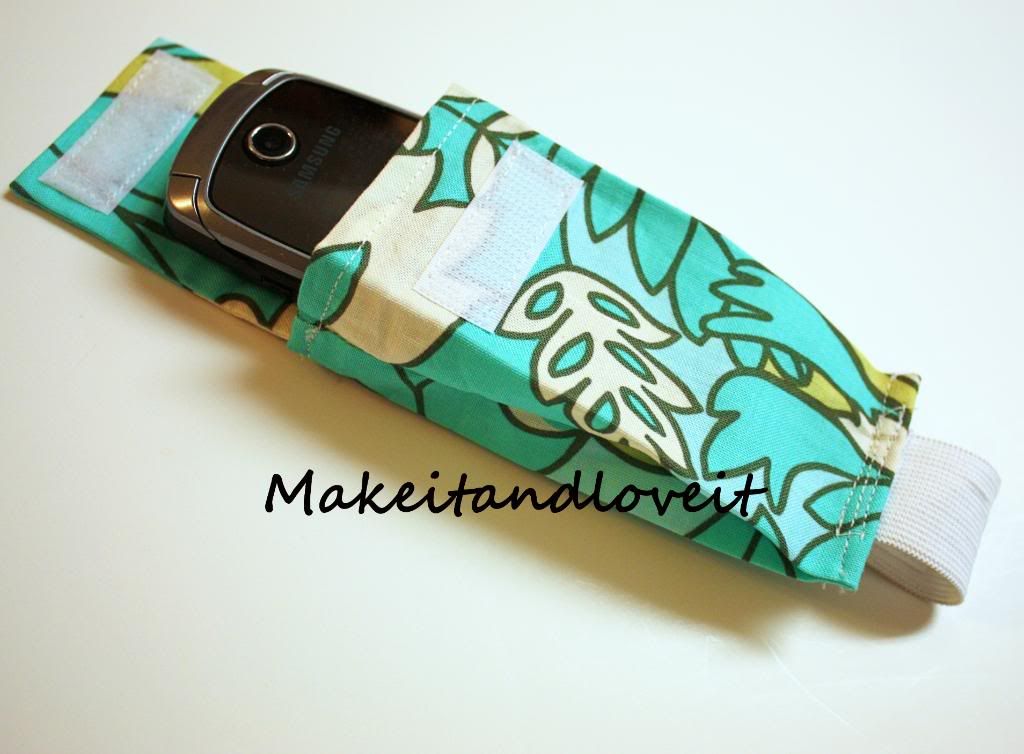
*Electronics Cozy

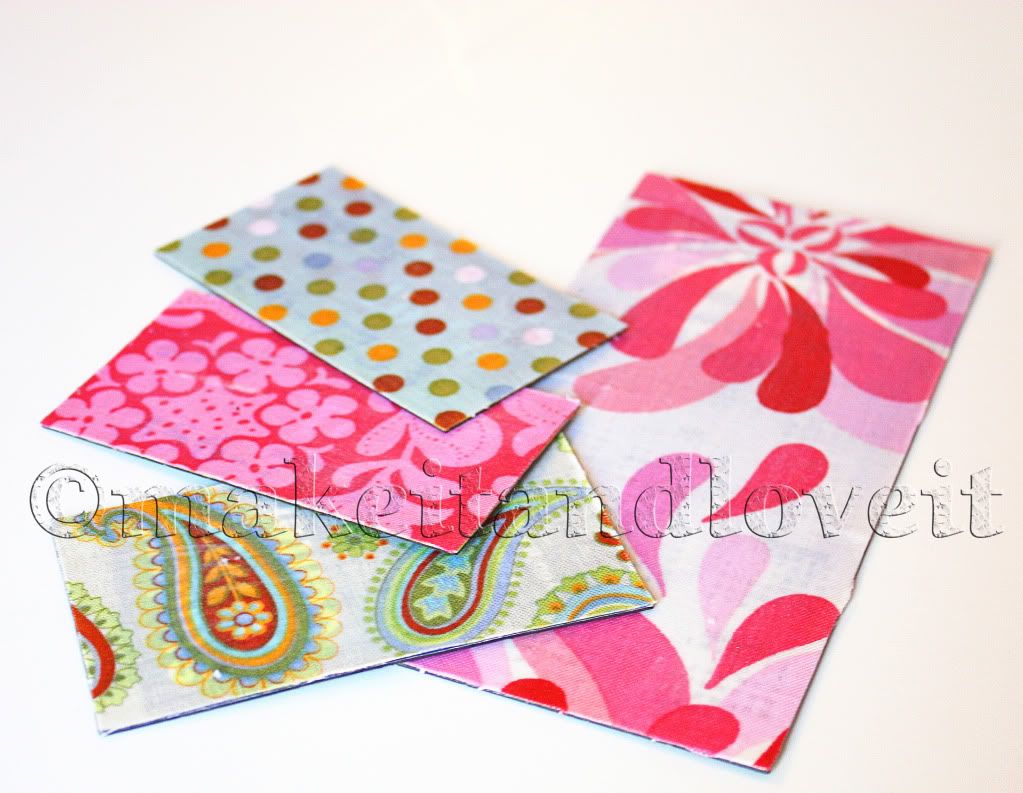
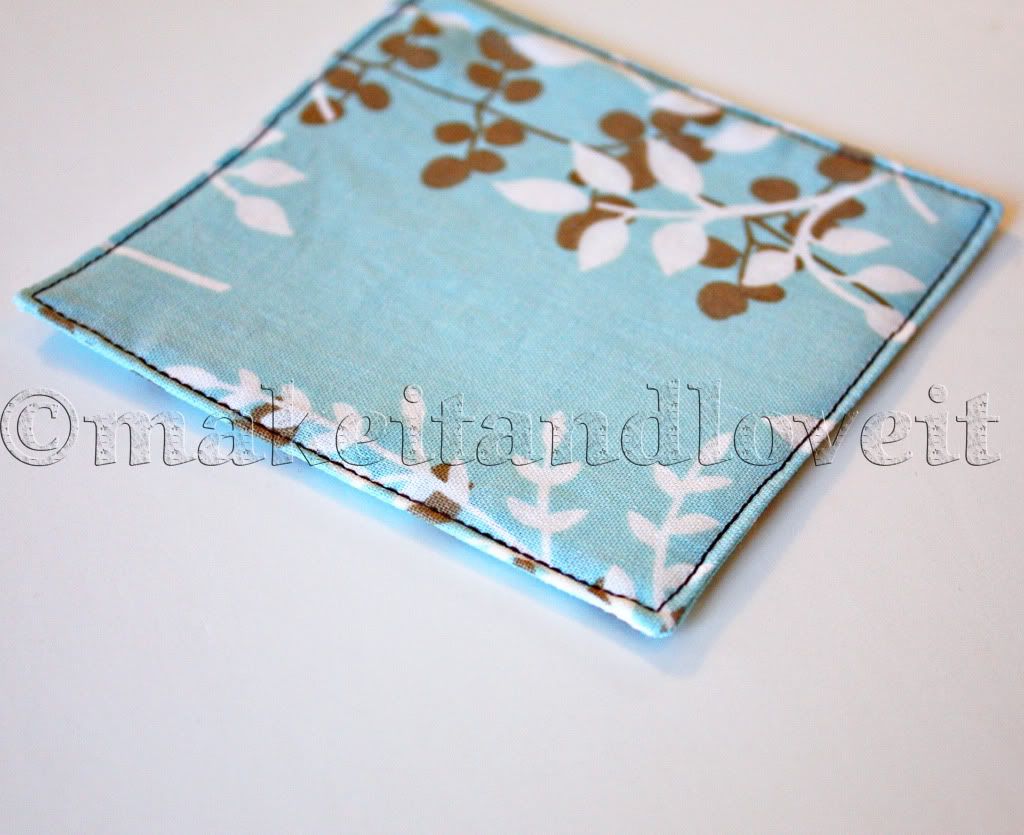
*Fabric Coasters
*Nursery Accesories
--Collapsible Storage Basket--

*Sofa Caddy


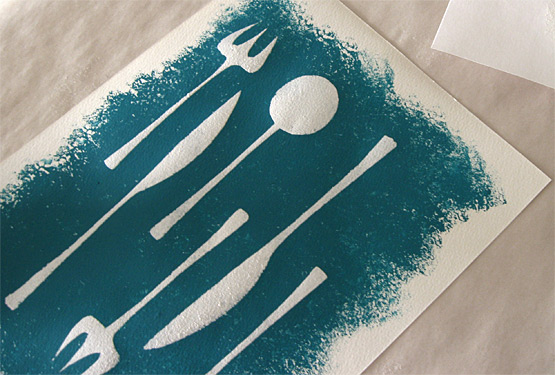
*No Sew Fabric Paintings

* I want to move the 2 sets of oddball storage jars from my kitchen and get all big matching ones and do this etching stuff:
Make Etched Glass Storage Jars
By DIY Maven
Martha shows us how to easily turn ordinary glass jars into pretty storage containers using glass etching and stick-on letters.
To make them, you'll need:
- jars
- painter's tape
- vinyl stick-on letters & decorative tape
- etching cream
- gloves, an old long-sleeved shirt
- paint brush
To read the rest of the tut, visit this page at Martha's place.
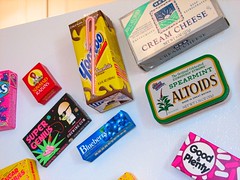
*Magnets!:) From EvilMadScientist.com
Making Crafty Fridge Magnets
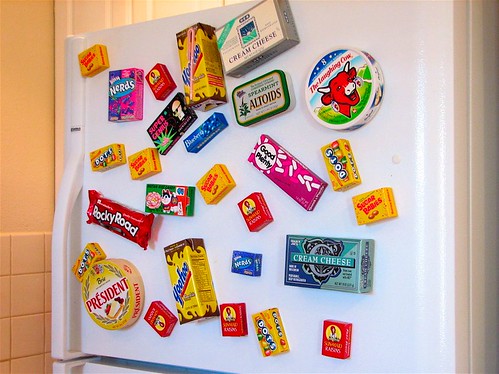 |
| Food comes in all kinds of shapes, sizes, and packages. Your kitchen cabinets, pantry drawers, and refrigerator shelves are already filled with marvelous little boxes and baggies of goodies. Some of these are cultural icons, others are silly modern wonders of neo-retro design. You may even have your own little collection of interesting little containers in the form of left-over little boxes of candy from Halloween. What can you do with all these things? Make them into an awesome array of fridge magnets! |
 |  |
 | 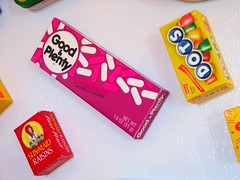 |
There are boxes of cream cheese and raisins, a tin of Altoids, a wheel of brie, and various types of chewing gum. There are sippy-boxes of yoo-hoo. There is rice candy, a squishy Rocky Road bar, and there are boxes and boxes of Dots. And then there is the slightly odd trio of Nerds, Good & Plenty, and Sugar Babies.
You can make magnets like these yourself. The first step is to pick some appropriate boxes to use. Most anything will work. Things that are small, recognizable, and come in (large sets of) small packages are a good choice. Right after halloween is a particularly good time of year for little boxes of things. Depending on your age, you've probably just been out trick-or-treating, or at home handing out little boxes of things to trick-or-treaters, so you may already have some cute boxes on hand. Even if you haven't gotten involved in the sugarfest, it may not be too late; you can sometimes find discounts the week after Halloween.
Beyond the box, you'll also need some magnets and some glue to hold the magnets in place. I used magnets extracted from plastic toys and hard drives. For small, light boxes (like most of these), one of the little magnets from plastic toys is fine. If your box is bigger, needs to hold more to the fridge, or you just like overkill, it's good fun to use one of the monstrously strong magnets from an old hard drive, preferably still attached to the bracket. There's one of those in the Yoo-hoo magnet, and it takes a lot of work to get it off of the fridge.
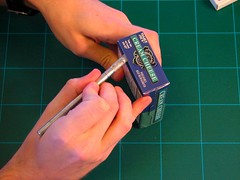 | If you've chosen to use a mint tin or other ferromagnetic box, your life will be easy: Just drop your magnet(s) in the box, shut the lid, and stick it to the fridge. Otherwise, welcome to the trickiest part of the project: Opening your boxes without making it look like they've been opened. If you've got large boxes, like the cream cheese box shown here, start with those. Most cardboard boxes used for packaging are assembled with glue. Find a flap that's held down by glue. Using a sharp knife, carefully cut through the glue that holds one of the flaps down. Be sure to not bend the flaps as you open the box this way. |
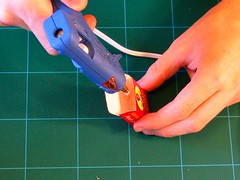 | Remove the contents of the box, drop in a magnet, and glue it in place. A hot glue gun is great for this. Drizzle in a little hot glue, and drop the magnet in on top of the bead of hot glue. Quickly place the box on a horizontal ferromagnetic surface (like the top of the fridge) so that the magnet is pulled down, flat against the side of the box and is then held in place when the glue cools. Optional extra step: Once the magnet is in place, add some weight to the box. Dried pinto beans are cheap and are the right size to substitute for many candies, such as sugar babies. For less rattly things like Dots or raisins, you can use additional hot glue to hold most of the beans in place. That one in the middle that rattles adds a lot of realism! |
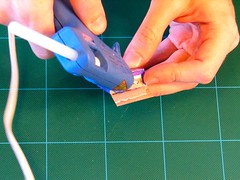 | It can be a little bit tricky to seal up the box without making it obvious that the box has been opened and resealed. Your best strategy is to try and put a small drop of hot glue exactly where the original glue was, right beneath that flap that you cut open. If you do this correctly, it will leave no trace whatsoever that the box has ever been opened. |
 | Once you've put that last drop of glue in place, fold down the flap and firmly hold it in place until the glue is cool, around one minute. |
|
|
| That's it, stick 'em to yer fridge. Make lots of them. Give them out as party favors. Give them out as birthday presents. Come up with new varieties. Completely cover your fridge. If you are devious, mix them in with real candy and confuse the heck out of everyone. It's up to you. Let us know what you're building! If you have any good suggestions for other objects to use, or maybe even a link to photos of cool magnets that you've made, you're welcome to leave them as comments. |
Further (future) reading: We've written another story about making magnets like these, focusing on the construction details of a few specific examples of these magnets. It will be published in The Hungry Scientist Cookbook, forthcoming from ReganBooks at HarperCollins in September, 2007. Until then, you can hang out with the Hungry Scientists in their group on instructables.

If that doesn't work click HERE
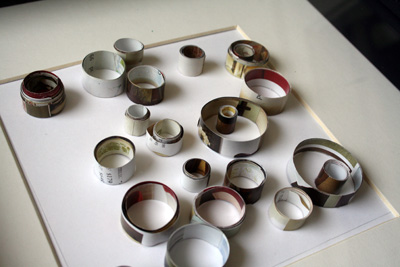
How to: Make a Toilet Roll Extension Cord Holder
 We've got a drawer full of unruly extensions cords that we've been trying to unsuccessfully keep in order with rubber bands and twist ties. While looking for cable management solutions, we found a tip about using a cardboard roll for cable storage and thought we'd give it a try...
 The version shown on Unclutter struck us as a fine idea, but it was missing a little something-something. Call us extreme aesthetes, but we wanted to make our cord holder a little more attractive (it's the Martha in us). We had a remnant piece of decorative wrapping paper we thought would do a fine job of fancying up our version of an extension cord holder. All you'll need is the paper roll, a small piece of wrapping paper, scissors and tape (recommend additional double-stick tape for a nicer finish).
 We wrapped our roll using one piece to adhesive the paper to the roll, while apply a double-stick tape at the finishing end for a seamless finish. You should have about 1/2" of excess wrapping paper length sticking out from both ends when done.
 Now cut every 3/4"-1" cut a slit down to the roll until all you've made it all the way around. Apply a piece of tap with a bit hanging off, fold over into the roll and adhesive down.
 Five minutes later and with absolutely no cost, you've got an attractive way to store your cords, cables and wires, all the while saving some items from the trash bin.
*Cool looking Cake (cool idea kassie!)
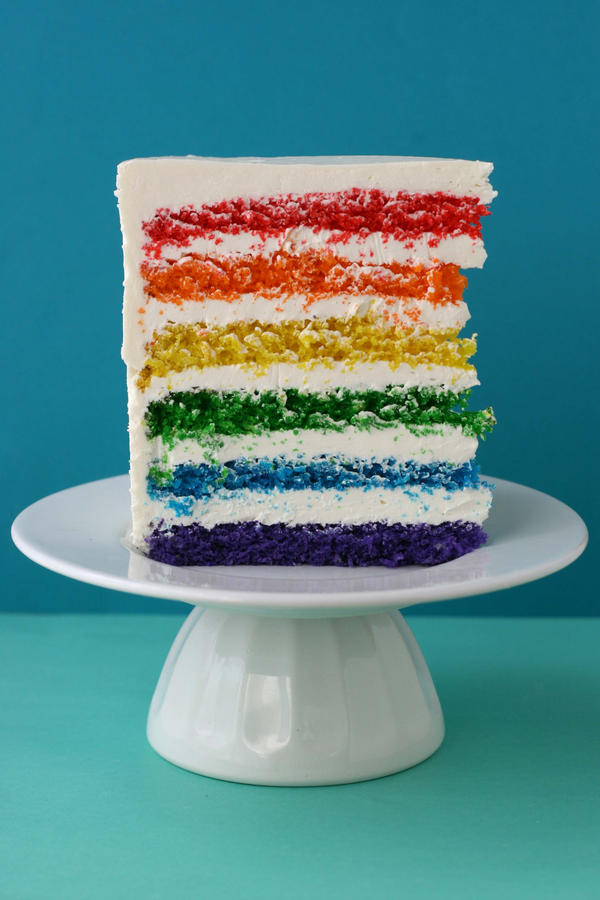
Super Epic Rainbow Cake
I'm adding a disclaimer here: THERE IS A LOT OF FROSTING IN THIS CAKE. I think it's too much, personally, but I used a lot because I wanted the cake to be very striking visually. It is intentional.
White Cake (but not really)
I made things difficult on myself and altered a coconut cake recipe for this. I don't know why I didn't just make a white cake from a white cake recipe, but.... I didn't. Here's the source if you're looking to make a coconut cake. It looks divine, but my friends don't like coconut :(
2 sticks butter, room temp
2 1/3 c sugar
5 egg whites, room temp
2 teaspoons vanilla
3 c flour
4 tsp baking powder
½ tsp salt
1 1/2 c milk, warmed for 30 sec in microwave to bring to room temp
Red, orange, yellow, green, blue and purple food coloring
Preheat the oven to 350F degrees. Oil and line how ever many 9” cake pans you have (I have three and I just reused them).
Sift together the flour, baking powder and salt. Set aside.
Cream the sugar and butter, then add the egg whites (I cracked them all into one bowl) and add them a little at a time. Add the vanilla and mix until fully incorporated. Then, alternating between wet and dry, add the milk and flour mixture in two parts.
Divide the batter amongst 6 bowls (I did it by weight. Weigh your mixing bowl before you begin adding ingredients and then subtract the weight of the bowl from the final measurement after the batter is completed. Divide that number by six and add that weight of batter to each bowl), and then whisk a fair amount of the appropriate food color into each bowl. Pour into the pans and bake for 15 minutes each.
When you remove them from the oven, let them rest on the cooling rack, in the pan, for ten minutes. Then flip, cover, and stash them in the fridge to cool quickly.
Lemony Swiss Meringue Buttercream
(Someday I will make a post, besides my pancakes or mint macarons, that doesn’t involve this recipe!)
I made this recipe twice today because I underestimated the amount of buttercream I would need/ I would recommend that you do the same because you would need a HUGE bowl to make this much buttercream at one time!
To fill and crumb coat:
9 egg whites
1 ¾ c sugar
4 sticks of butter, room temp
2 tsp lemon extract
To frost:
5 egg whites
1 c sugar
2 sticks butter, room temp
1 tsp lemon extract
Cook the egg whites and sugar in a small saucepan over medium heat, whisking constantly, until the sugar is completely dissolved (test by rubbing some between your fingers. If it's completely smooth, it's done). Pour into another bowl (a stand mixer is preferable) and whip on high speed until room temp. Then, on a medium-slow speed, add the butter, waiting until each piece is completely incorporated before adding the next. After all the butter has been added, turn the mixer back to high speed and whip until it has come together, about five minutes. Add the extract, beat briefly and then use.
*Canvas Floor rug

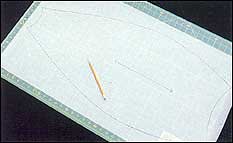
Steps 1 - 3
1. Lay out a preprimed canvas with a 1-inch allowance on all sides for finishing the edges. We started with 3- by 5-foot canvases (about $8-$10 each at an art-supply store).2. With a foam paint roller, apply one coat of acrylic latex paint for your background color. Be sure to cover the entire front of the canvas. Allow to dry completely.
3. Using a sturdy, nonmarring tape, hang your canvas on a flat, vertical surface in a room that can be darkened, so the projected image will be easier to see.

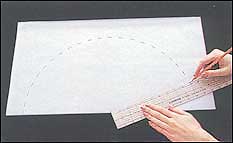
Steps 4 & 5
4. Place the projector, with the photocopied pattern beneath it, on a flat surface approximately 8 feet from the canvas. Move the projector forward or back until the pattern on the canvas is the desired size.We used an Artograph Tracer projector (available at crafts stores; $80) to transfer our designs onto canvas. The Tracer will enlarge images up to 14 times their actual size. The Tracer Jr. ($50) will enlarge an image up to 10 times the original. We needed the stronger projector to enlarge an image in one step to fit a 3- by 5-foot canvas.
5. Use a pencil to trace the pattern onto your canvas.

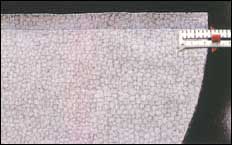
Steps 6 & 7
6. Once you have completed the tracing, use a paintbrush with a flat, rounded tip (called a cat's tongue) to paint within the lines with your second paint color. If you are painting a light color onto a dark color, you may have to use two coats. Allow to dry completely.7. To make the surface durable, apply matte varnish according to the manufacturer's instructions with a foam roller.

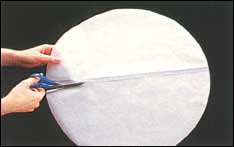
Step 8
8. To finish the edges of the canvas, fold under 1 inch on all sides. For a mitered edge, use scissors to cut a triangle out of each corner. Use fabric glue to secure the folds.
TIPS:
- Used bookstores are a great place to hunt for inexpensive books containing decorative patterns.
- If you are tracing your pattern onto a dark color, use a white pencil.
- If your canvas starts to warp or wrinkle, roll it firmly around a gift-wrap tube and leave it for several hours.
- To give the floor coverings added durability, apply at least three coats of varnish.
- When finishing the edges of the canvas, use books as weights to keep edges folded under while the fabric glue dries.
- Put a thin foam pad under your finished mat to keep it from slipping.

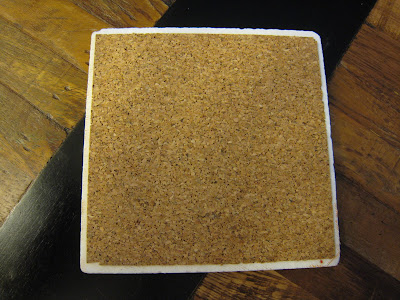
*Coasters (again)


I made these at a crafting party we had recently and they were a huge hit!
What You'll Need:
Roman Tiles (from your local Home Improvement Store)
Rub-On Transfers (I got the ones shown above from Hambly)
Thin cork material or rubber feet for the bottoms (available at office supply stores or craft stores)
Spray-on Polyurethane (available at Home improvement Stores)
DIY Stone Tile Lamp
By DIY Maven
Instructable-er ChrisN balked at those expensive marble lamps and decided to go the DIY route. The materials, not counting the adhesive cost only $13, which is a far cry from its $120 inspiration. To give one a go yourself, you'll need....
- 8 - 4" x 4" marble/stone tiles
- a picture frame, used as the wood base
- light socket, cord and 2 wire nuts
- vinyl bumbers
- glue, Weldbond is suggested
*This isn't something to MAKE, but I thought it was cool. I use White vinegar as fabric softener and to clean things.
CLICK HERE for 175 Uses for White Vinegar!
here's 4 of them at curbly.com
*Sew your own couch...right on!
thank you CURBLY.com
For one 4" thick cushion:
- 22" X 22"X 4" foam cushion
- 1-1/3 yd 45" home dec fabric
- 2/3 yd contrasting print for side bands
- 1/2 Yd contrasting solid for cording
- 5 1/3 Yd 3/4" cording
For one 8" thick cushion:
- Two 22" X 22" X 4" foam cushion
- 1-1/3 yd 45" home dec fabric
- 1-1/8 yd contrasting print for side bands
- 1/2 yd contrasting solid for cording
- 5 1/3 Yd 3/4" cording
For both sizes:
- 8 Buttons
- Heavy duty thread
- Basic sewing supplies
- Directions (1/2" seam allowances)
|
|
|

Both ideas from SEWING.ORG
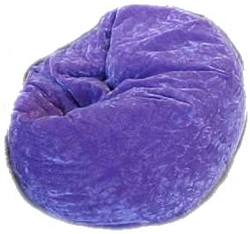
*Bean Bag Chair-Sweet:) I know the instructions got cut off a bit on here. so click on the "BeanBag Chair" link
|
|
 |
|
| ||||||||||||||||||||
|
|
|
|
|
| ||||||||||||||||||
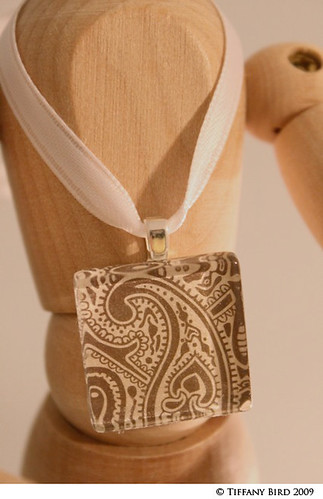
*Scrabble Tile Pendant
Scrabble Tile Pendant Tutorial
I’m excited to share this tutorial for Scrabble Tile Pendants from Mark and Stefani at HomeStudio. They’ve so graciously provided this how-to for making these lovely pendants to all of us crafters. These pendants are great for necklaces, charms, and gifts to give. To purchase these pendants with HomeStudio’s one of a kind designs, please visit their Etsy shop.
Scrabble Tile Pendant Tutorial

Supplies needed: · Paper · Scrabble Tiles · Scissors · Craft Glue · Metal File · Mod Podge · Small Paint Brushes · Utility Knife · Diamond Glaze · Super Glue · Small Aanraku Jewelry Bails in Silver

Step 1:
Choose your paper wisely! I use a template card, a little template on an index card with a hole the size of a scrabble tile. That way when I shop for paper, I can see if the pattern will fit the tile. You can use almost
any paper you find; scrapbook paper, card stock, Japanese Washi paper, origami paper, gift wrap, even lightweight recycled greeting cards. Everything will become a possibility, so experiment. Using a light box (or holding your paper to the window), use your template card and trace the pattern for your tile. Trim the paper about a 3/4” to 1/2” around your outline. Allow enough excess paper so you can hold the paper while spreading the glue.

Step 2:
Using a paint brush and your light box, “paint” a thin layer of glue (I use Tacky Glue) onto the back of your paper. Place your tile in the box, being sure to notice which way is up so your letter isn’t upside down when you’re finished. I like using a thin glue.
Step 3:
After about 10-20 minutes your glue should be dry. Using a utility knife, carefully trim around the outside of the tile being careful not to cut the tile in the process. The wood is pretty soft.

Step 4:
Gently file the edges of the paper to be smooth and flush with the side of the tile. Since the wood is soft, be careful not to file too hard. You may want to experiment with different types of metal files in order to find the one you like best. The one I use is a medium grit file.

Step 5:
Now you need to seal the paper. Use a paint brush to apply a thin layer of Mod Podge. I like to seal the top and all sides. Let that dry for 10-20 minutes. I like to lay my tiles on wax paper so the glue doesn’t stick to my work surface. A cookie sheet lined with wax paper works perfectly!

Step 6:
Once the Mod Podge is dry, it is time to apply the Diamond Glaze. Do NOT shake the glaze. First, I like to make a little dot on my wax paper. The first dot usually has a bubble & I’d rather have it on the wax paper than on my tile. Holding the bottle at an angle, apply the glaze around the edges and then fill in the middle. Be sure to get close to the edges. The glaze shouldn’t roll off the edge, but in case it does, just file it off when the whole thing is dry. If you get a bubble, which will happen, just use your fingernail to pull it off the tile. You can use a needle, but I find that is harder to do. Diamond Glaze is water soluble, so it just washes off with soap and water. Now let your tile dry for a minimum of 4 hours. Dry your tile in a cool place where it won’t get bumped by anyone.
UPDATED:
I let mine to fully cure 3 days before packaging it. The glaze manufacturers may suggest less time but to be safe, plan on 3 days.

Step 7:
Now attach the silver bail. Hold the bail with your fingers, put a drop or two of glue and hold the tile in place. I like to use Super Glue because then it’s stuck “forever”! The only down side, is that if the bail isn’t exactly centered, it’s tricky to remove. In seconds, it’s attached and ready to go!

Step 8:
Now to clean up any rough edges. Get your metal file again and smooth down any rough edges and excess glue. Now you’re finished! Enjoy your pendant.
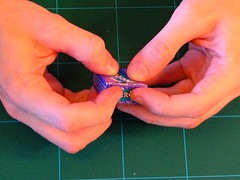
The Japanese kusudama is a paper ball made out of multiple identical origami shapes glued together. They were traditionally used as a ball for incense or potpourri but now we see them more for decoration or as a gift.

Today I am showing you part 1 on how to make the Japanese traditional shape. There are many different patterns to make a kusudama ball but I find this the easiest pattern to get started. This is also the pattern I used to make the pink flowers on the tree in the banner.
What you need for this tutorial is:
- 60 pieces of paper cut into squares. The pieces are each 7 x 7 cm or 3 inches square.
- Glue
Below I will show you how to make the basic shape, you need to make 60 of these. Every flower will then have 5 of these shapes or petals glued together, making a total of 12 flowers. I will explain how to glue them together in a tutorial later this week…, you can find part 2 here.

Fold the bottom corner to the top. This will make a triangle.

Fold the left and right corners up to the middle corner. This make a square.

Fold the same points down. The folded edge will line up exactly on top of the outside edge of the square.

Open up the flaps you have just created and flatten them.

Fold the top triangles towards you so they are level with the edges of the paper. (This will result in 3 little petals on the inside of your petal; if you fold the top triangles away from you, this will result in only 1 petal on the inside of the petal – see variation on pattern below.)


Fold the triangles back using the crease you made earlier and glue the outside triangles together.
Now make 5 more of these petals and glue them all together. Make sure you wait until the glue is dry after every petal and take your time. You will need 12 flowers to complete the kusudama ball; I will show you how to complete it later this week, you can find part 2 here.

PART 2 (making them into a ball) is on the link.
*Pearl/Ribbon Bracelet Found on Oh So Crafty Blog!
Lanvin Inspired Bracelet
Barneys is selling this necklace, (and no those are not real pearls,) for $890.
Seriously? $890 for some ribbon and faux pearls?
I made this bracelet in about 30 minutes using supplies I had lying around.

I'm sure I could replicate the necklace completely with a trip to the craft store.
Here are the basic instructions.
I used some satin ribbon, a broken pearl necklace and thread. Next time I will use grosgrain ribbon and a strand of embroidery thread, as I think they would be better suited to the project.

I started about 12 inches from the end of the ribbon sewing the pearls on with a basic running stitch, leaving a space the size of a pearl between each bead.

back view

For my bracelet I used eight pearls

Once my pearls were on I started pulling the thread, just like you would if you were gathering fabric.

This is what it looks like all gathered

I tied a simple knot by the last pearl, at each end of the bracelet


Thats it. If I make these for gifts I will buy some jewelry findings and put a proper clasp on, but I did this on the fly, and it worked out pretty well.
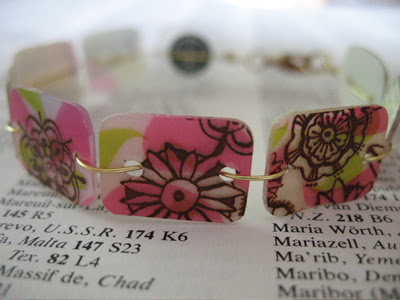
Gift card bracelet.
Lots of crafty things have been going on here; I just get too lazy to take and post pictures. I made this bracelet for the birthday of a coffee loving friend, out of a Starbucks card. I cut the card into squares, then rounded them with my Dremel. I used the Dremel to drill holes in each piece also. Then I strung the bracelet using a piece of gold jewelry wire, I'm including a matching Starbucks gift card with the bracelet.

* okay, I'd prob. suck at this, but I'm sure Kassie would be awesome at it!

*Heart Shaped Paper Clips...I'm totally going to make lots of different paper clips now! Thanks Oh So Crafty!
Paper Clip Hearts
Using 4-5 inches of wire, find the middle and bend it into a point, then take your needle nose or jewelry pliers, and curl each end.

I use my fingers to bend the curled ends in forming a heart.

Heart shaped paper clips!

See video of hot to do it on above link:)
Basicly you just cut strips and glue them on colored paper then the white part you cut out a design and put the strips paper under the white design and put into a frame.

* Ornament Hooks
pretty Self-explanitory just bend wire however.
![[ornament+hook.jpg]](https://blogger.googleusercontent.com/img/b/R29vZ2xl/AVvXsEiwz7QOlFBLKqNegh9DUURHPpIvA2UMVbVMG1pkqGjyZpUQ_ievxLNnw1lP18-okwPfuvQ3CbQSHTcPKI8PGwuPfcSD5anteSiUm8AHUN84o0q4FGogPbLW-sIyOHt5K4QOPCeS20rcEuFL/s1600/ornament+hook.jpg)
* Recycled Art Again, this lady is awesome! check out the project at A Little Hut
recycling project no. 5 - rolled paper strips
I was going to save this project for next week but we were pounded with heavy rain most of the morning so here it is. I think this is the gloomiest summer we’ve ever had!
This is a very simple project that again, uses materials that we probably all have at home. This time we used:
• strips of paper cut out from a catalog (sorry Pottery Barn!)
• a glue stick (used to glue the end of the little rolls of paper)
• Elmer’s glue (the kids lightly dipped the rolls of paper into this glue)
• cardstock for the background
I thought the kids were going to be able to make the little rolls of paper but it turned out that they either didn’t have the patience for it or their little hands just couldn’t handle the task at hand. In order to stop seeing their little frustrated faces (this is supposed to be fun!) I ended up making all the little rolls of paper myself. I would’ve probably made a wider variety of sizes but the kids were going really fast and I was trying to keep up with them. This reminded me a little of the quilling that my sister-in-law taught me last year but trust me this is not a good representation of what I learned. Speed was of the essence - "Mommy, mommy I need another one... quick! quick!"

When we work on these little pieces I never tell the kids to make anything in particular. The only limitation I give them is the pencil line that I draw to show them the amount of space they have to work on. The rest is up to them. Spontaneous abstract art is the theme we seem to be working with. ;)
Little C's - She was going fast!

D's version - after he finished he said he sees a shark!

Mine...
Our art wall with our new project.
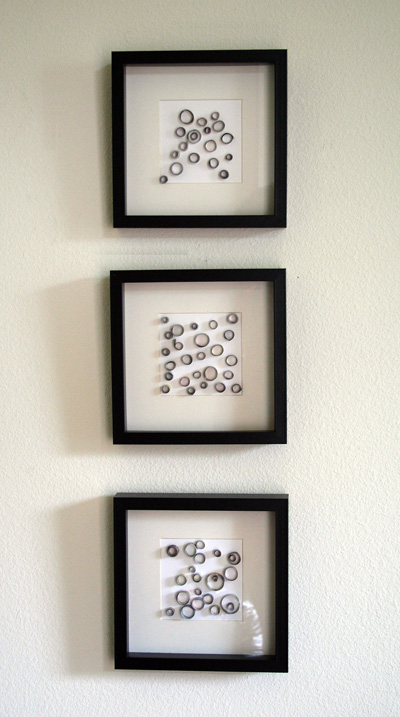
All of her projects on her site are awesome and almost all are using recycled materials.
Check it out HERE
Here's her (Patricia Zapata) Book:
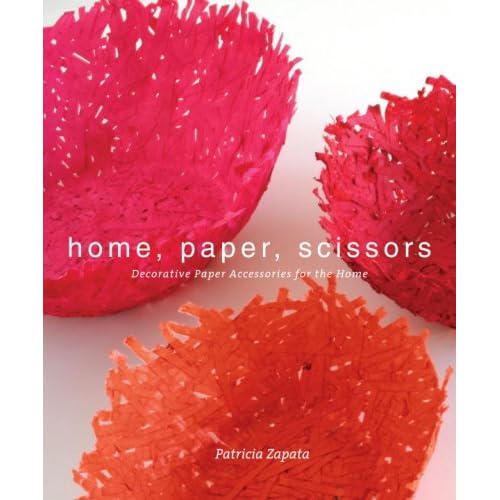
It's on Amazon for like 13 bucks.
Recover Your High Chair Instructions HERE
 "I took a boring plastic mini storage solution. Cut scrapbook paper to fit behind the drawers. Mod Podge (yes, Mod Podge!) the paper in there. And now all my pens, pencils and tape are hiding behind circles." (Quote sited HERE)
*Fabric covered paper clips
PDF HERE
 You can also just paint them and mod podge decorative paper to them.
*Easy Burb Cloths and Bibs
Tutorials HERE
 *Another cool car seat cover:)
From "While They Sleep" Blog
Car Seat Cover Tutorial
 *Fitted Sheet Skirt
Tutorial HERE
 *Another cute skirt tutorial:)
Tutorial HERE

*Cute Baby Booty Patterns
There's a whole list with free patterns and lots of different styles HERE
My favorite are the little Mary Janes found HERE


*This cute zipper bag!
![[pouch.jpg]](https://blogger.googleusercontent.com/img/b/R29vZ2xl/AVvXsEh_dUAjekuQ74Itjl_YClJ6zL3GgCQkudQhUxkvymdhsKuBL3tA4zQzQWKD5NEXKzRmccV2cYDmAjNbncg6B8kvgt3Y0yymQMKpenUxINS_qMp4xT2NTuFOXs6bipg1Dl0nIpqR2fJtT44R/s1600/pouch.jpg)
I found this on the "How about orange" site. It's super cute. I followed the link to the Marie Claire French site (be sure and type in translation into your google search and get the page translated from French to English)
I think it would be easier to just get the printable fabric and print the image right onto the fabric. rather than getting a iron on transfer paper thing...might be easier to find. Plus some of the ideas she shows on there are cool. I bet anyone could come up with a cool photo like that and make it into a purse...we should try that kassie! It would be fun!
Ok, so here's the original link for the zipper bag: How About Orange
kind of a cool site. I found some cool printable PDF tags on there! They are in french of course, but I think that's what makes them cooler. The french are so down to earth and talented artists. Props to them.
Sign...that site makes me want to pick up and move to Franch! haha Or at least visit there amazing gardens. No wonder they all have green thumbs and can paint like none other. They are surrounded by it from the time they are little and the knowledge is so readily available to everyone through workshops and such.
- Portable DVD Tote from Make it and Love it!
I love this pattern! SO easy and way cute!
I could totally just make this as a regular tote or make a cool laptop bag! maybe if I could figure out how to make inside pockets without it looking dumb (maybe on the divider and where the outside pocket is so you can't see them). Then I could make a diaper bag with the same sort of concept?? endless possibilities!
![[mailsorter11.jpg]](https://blogger.googleusercontent.com/img/b/R29vZ2xl/AVvXsEii6WdTCT0zBHHmveTKmqTltp3NVu8Gg8N7Zro-8k5SMMDRQePZuhj_3MLSKBCK-4O6jqeafUyCHLucTdpehCB3AgWz1nwNzqiweG2McjalOatFBkHcb9A_Rza-qpXVuWmqL2-65ZvB64Z9/s1600/mailsorter11.jpg)
*Beaded Keychains (so easy!)


*Messenger Bag made from Cargo Pants! Very cool and easy:)
Link to Noodlehead Blog Tutorial HERE

*Another Easy Bag:)

I like the idea of just getting handles. It's alot easier that way!


*cute clutch! Click on photo for link or HERE for PDF File


*Glass Pendant Necklace Tutorial
This looks cooler and easier than the scrabble tile one!
*Camera strap with pockets! very handy!

*Pillow Cover with pocket for Remote Control
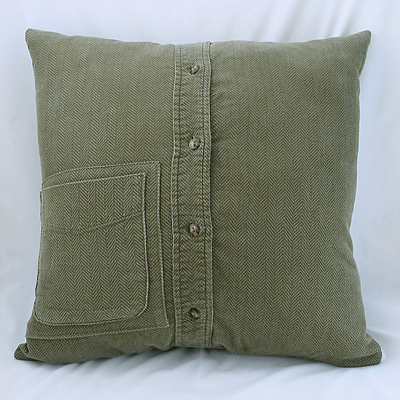
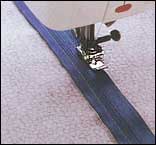
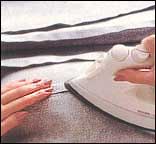
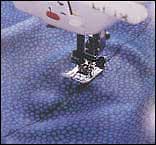
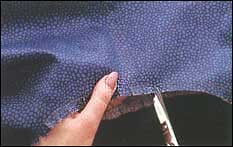
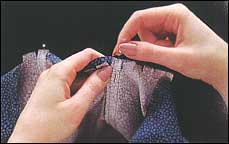
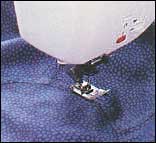
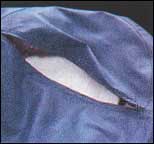
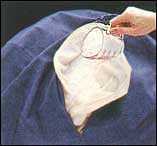
* Simple Zipper Pillowcase Tutorial *
(above link is to PDF file sorry HERE's the original link)


* 170+ Bags, Purses, Pouches & Backpacks Tutorials!*
(That's ALOT of tutorials!)
* 1,000+ Free Tutorials & Patterns! *
(again, ALOT)
No comments:
Post a Comment