So this is the baby shower gift I made:) It was super easy and cost be around $10 (I already had ribbon, key toy &diapers on hand) I got everything at the dollar tree (And that included the bag). I also added a burp cloth for the "seat" and poopy bag holder things under the seat part (also got at DT) Oh, and not shown is the tissue paper I stuck in the handle part because I couldn't find boy socks at the dollar store.
Link to tutorial below...
Link to tutorial below...
Ok, so I also did this:
Only I should have used smaller sticks and I just mixed in Reeces PB Chips (like choc chips--brilliant U think!) and some choc chips! Very yummy but next time I'll just melt the PB Chips and coat them! Anyway, we downed them so I didn't get a picture!
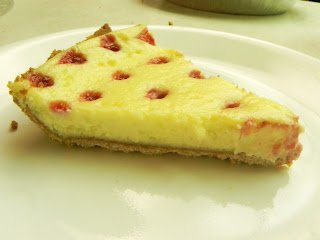
I also made some yummy cheesecake! I used this recipe (my fav!) Only I did the heart swirl kind...I can't find the link to show how to do the heart swirls...but ya!:) Here's the pinterest one:
Oh, and some yummy crumb cake I made:) mmmm
Scrabble Tile Magnets & the Coasters I made for my mom for her B-day
Scrabble Tile Magnets & the Coasters I made for my mom for her B-day
Here's the circle quilt I made awhile back! I can't remember where I got the pattern from??
I didn't really use a pattern...I cut circles, spray glued them where I wanted them, sewed them on (about 1/2 inch inside the circle-- and just outside them after I bound the front & back ) It has a frayed affect. Bind and wahla!
Rice Krispy Pumpkins I made for Booing our neighbors
So I made this adorable crinkle toy for Sophia! She LOVES it!
I cut out a butterfly with my cricut machine and used the heat n bond to iron it on before I sewed and stuffed it. It was cute for about 30 mins! Then Allison decided to take the butterfly off:P So next time I'll sew my applique on:/
Anyway, I stuffed it with recycled grocery bags to make it crinkle! I've also seen where they attach a velco strap thing so you can attach it to the car seat! But I didn't do that with this one. Cute & simple!
And Flat iron cover I made for Whitney.
So below is the tutorial link I used!


No comments:
Post a Comment